If your Vancouver renovation includes new flooring, there is a good chance "self-leveling underlayment" came up in the quote. It is one of those line items that homeowners often try to remove to save money — and one of the most common reasons floors fail within 2–5 years.
This guide covers what self-leveling underlayment actually does, when Vancouver homes need it, and how to spot when a contractor is skipping it to win the bid.
What is self-leveling underlayment?
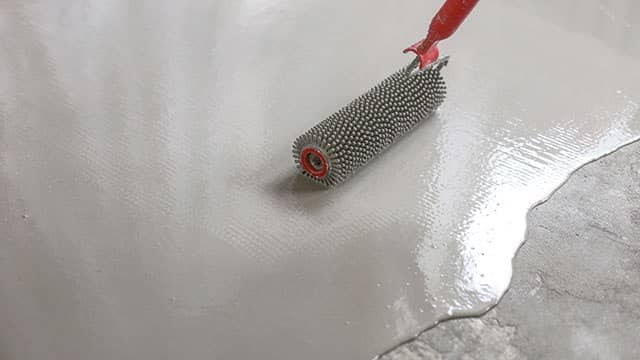
Self-leveling underlayment (SLU) is a cement-based or gypsum-based liquid that is poured onto a subfloor. It flows out to fill low spots, levels itself by gravity, and cures into a flat, hard surface ready for tile, hardwood, luxury vinyl, or carpet.
A typical pour is between 1/8" and 1.5" thick, depending on how out-of-level the existing subfloor is.
Why Vancouver homes often need it
Vancouver's housing stock has three common subfloor issues that require leveling before new flooring goes in:
- Older homes (pre-1990) with sloped plywood subfloors. Wood subfloors settle unevenly over decades. A house that was perfectly level in 1985 can have 1/2" of dip across a 10' span by 2026.
- Concrete slabs in Vancouver condos. Concrete-pour slabs in 1970s–1990s buildings often have 1/4"–3/4" variation across a single room. Modern luxury vinyl plank requires a substrate flatter than 1/4" over 10' — without leveling, the planks will rock, click, and break their locking joints.
- Removed legacy flooring leaves uneven surface. Removing old vinyl, ceramic tile, or carpet often leaves adhesive residue, grout lines, or thinset bumps that must be evened out before new flooring.
When self-leveling is required (not optional)
- Luxury vinyl plank (LVP / SPC). Manufacturer warranties require substrate flatness of 3/16" or less over 10'. Without it, plank joints crack, edges lift, and the warranty is void.
- Engineered hardwood with glue-down installation. Adhesive cannot bridge low spots; the result is hollow-sounding floors and creaking.
- Large-format tile (12" x 24" or bigger). Larger tiles "lip" badly on uneven floors. Tile council standards (ANSI A108.02) require 1/8" over 10' for tiles above 15" on any edge.
- Heated floor systems (electric or hydronic). The heating elements must be fully embedded — a leveling pour over the wires creates the embed and protects the system.
When self-leveling can be skipped
- Floating laminate or engineered floors on already-flat subfloors. Quick check: a 6' straight edge anywhere on the floor with no daylight under it = probably flat enough.
- Carpet over plywood. Carpet conforms to small undulations.
- Click-lock LVP rated for "subfloor irregularities." A few new high-performance products tolerate up to 3/8" over 10', but always check the spec sheet.
Cost of self-leveling in Vancouver
| Scope | Typical Vancouver cost |
|---|---|
| Skim coat (1/8"–1/4") for general flatness | $2.50–$4.50 per sq ft |
| Standard pour (1/4"–1/2") to fix dips | $4–$7 per sq ft |
| Deep pour (1/2"–1.5") for major level correction | $6–$12 per sq ft |
| For a 600 sq ft Vancouver condo (typical kitchen + living area) | $1,500–$4,000 |
Red flags when a Vancouver contractor skips self-leveling
If you have ever had a quote where another contractor came in $2,000 lower than ours, it is often because they skipped one of these prep steps. Watch for:
- Quote does not itemize self-leveling or "subfloor prep"
- Contractor says "the new floor will hide any imperfections" (it will not)
- No mention of subfloor flatness assessment in the quote
- They plan to install LVP directly over old vinyl without a leveling skim coat (almost guaranteed to fail)
- They use floor leveling compound that is not rated for the subfloor (gypsum-based SLU should not be used over wood subfloors that may flex)
The 1-year test
A properly self-leveled floor stays flat. An improperly prepped floor shows symptoms within 12 months:
- LVP joints clicking or lifting (subfloor moving)
- Tile cracking (subfloor flexing)
- Hardwood gaps appearing (deflection in unsupported low spots)
- Squeaks where the floor walks on hollow spots
If you see any of these within 18 months of installation, the issue is almost always insufficient prep, not the flooring material itself.
Self-leveling FAQ
How long does self-leveling take to cure?
Most modern Vancouver-grade self-levelers are walkable in 4–6 hours and ready for flooring installation in 12–24 hours. Heated floor pours may need 48–72 hours before the system can be turned on.
Can I self-level over old tile?
Sometimes — depends on the tile bond, age, and what is going on top. We typically remove old tile rather than level over it, because hidden cracks under the level coat can telegraph through within a few years.
Will self-leveling crack?
Properly mixed and applied SLU resists cracking for decades. Cracks usually come from skipping the manufacturer's primer step, mixing wrong (too much water), or pouring over a subfloor that flexes excessively.
Does my condo strata need to approve self-leveling work?
If the work is part of a flooring renovation that has already been approved, usually no extra approval is needed. If it adds weight that could be a concern (deep pours of 1"+ over a large area), check with strata to be safe.
Is gypsum or cement-based SLU better?
For most Vancouver homes, cement-based is the safer choice — handles moisture better, works over plywood and concrete, and is more forgiving of small mixing errors. Gypsum-based is faster-curing but cannot be used in wet areas (bathrooms, laundry) or anywhere moisture might reach it.
Ready to plan a flooring renovation that lasts?
Our installation team includes subfloor leveling in every flooring project quote, with a written substrate flatness assessment before any flooring goes down. We use cement-based SLU rated for Vancouver's coastal climate and have been doing this across Vancouver, Burnaby, Richmond, and the North Shore since 1999.
Request a free flooring quote with subfloor assessment or learn more about our flooring services.